Create a project
Create a project, link it to a client and get it ready before the review.
The project is the heart of etouch: it connects a client to a set of photos and follows the whole process through to delivery.
Create a project
From Projects, click Create, then fill in:
- a clear name (for example "Summer Collection – Packshots");
- the client involved;
- the project options if needed (retouching on or off, and so on).
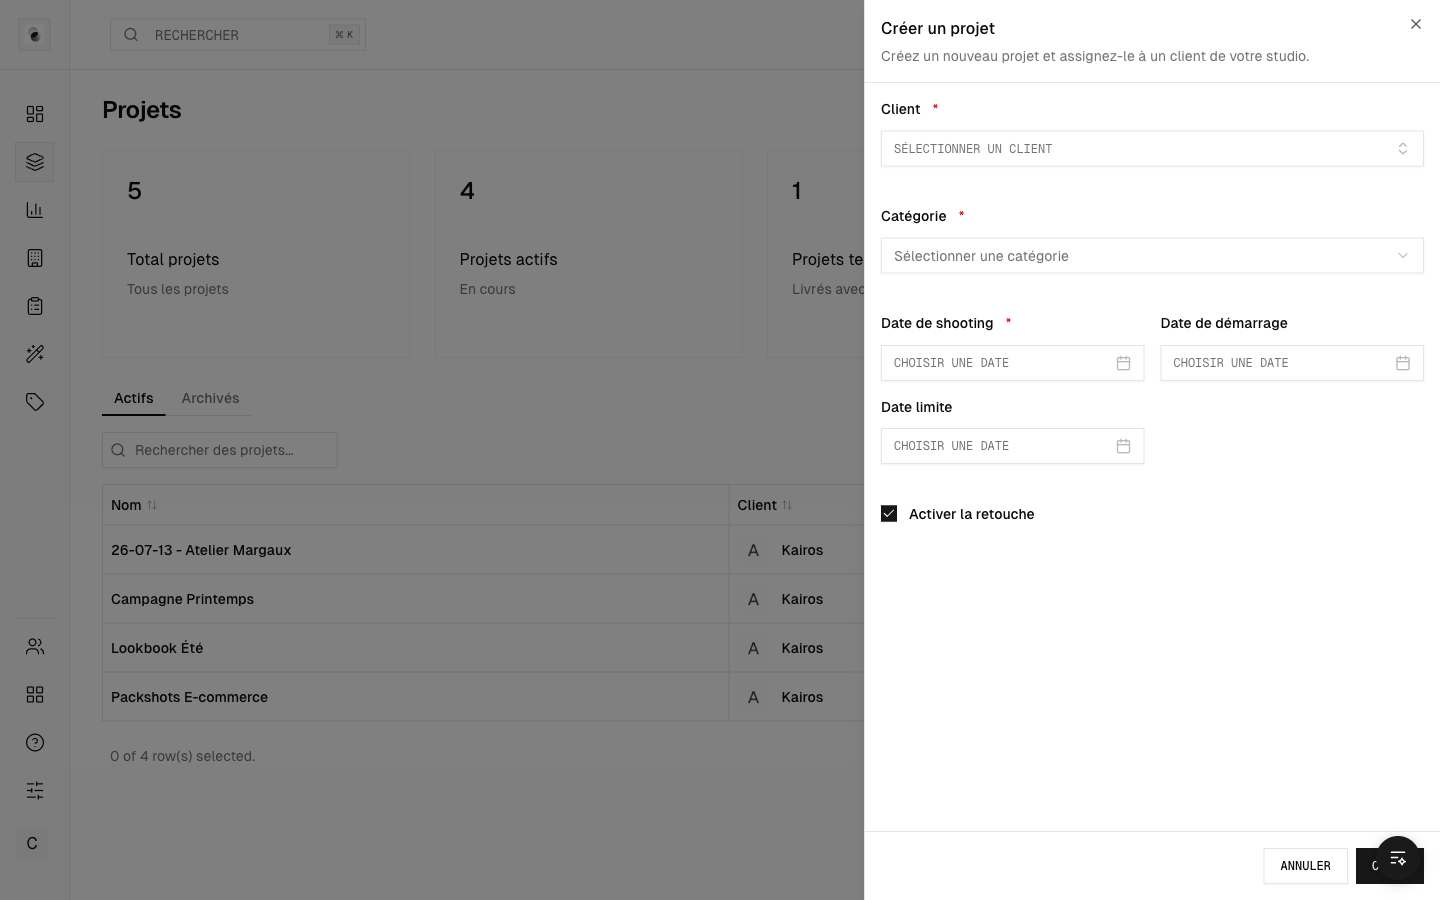 Creating a project
Required fields are marked with a red asterisk.
What happens next
The project starts at the Studio preparation stage. It isn't visible to the client yet: you have time to get everything ready (import the media, set the guidelines and the pricing) before opening it up for client review.
A project's page
Once created, the project has its own page, organized into tabs:
- Media — the photo gallery;
- Billing — pricing, quotes and invoices;
- Activity — the history of events;
- Settings — guidelines, retouchers, sharing.
At the top, the progress bar shows the current stage (see Track a project's progress).
Next steps
- Import the photos — see Upload and import media.
- Set the pricing — see Pricing and quotes.
- Assign a retoucher and guidelines — see Assign retouchers and guidelines.